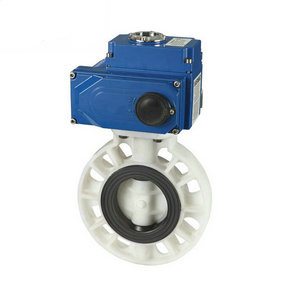
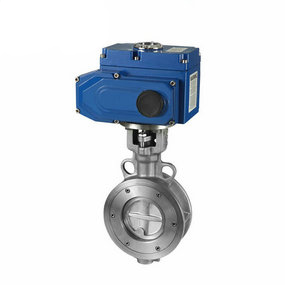
Regulating parameters of electric butterfly valve
LRT-CM2 Operation Manual 1、 Nixie tube display Under normal automatic control, the blue nixie tube big tube displays the percentage value of the current valve position output value. When the valve is closed in place and opened in place, the close and open position indicators will be on normally. After entering the setting state, the red nixie tube displays the symbol of the menu item. The loss status symbol is displayed when the message is lost. 2、 One key setting Press and hold the up key and set key for 3s to release to enter the automatic travel setting state. First, the nixie tube displays The symbol actuator automatically opens, stops when it reaches the position, and saves the opening value. After a delay, the actuator automatically turns off the nixie tube display
 When the symbol is in place, it will stop automatically and save the closing value. After completing the automatic calibration, it will exit the calibration state automatically. (Note: The actuator should be in the middle position when automatically setting the stroke, so as not to increase the error of setting the stroke.) 3、 Menu settings Press the setting confirmation key 3S to quickly enter the menu item setting. (Note: Press the OK key to shake or press it twice consecutively to enter the submenu of signal loss action. Press the Set key to return to the secondary menu. There are 12 items in the setting menu. You can select the menu option to be set by pressing the Up key and Down key. 1. The blue nixie tube displays C1, and the red nixie tube displays flashing
 The symbol indicates the menu item of signal loss action setting. At this time, you can press the OK key to enter the sub item setting of signal loss action. There are three options in the sub item, namely, the digital tube display of the signal loss gate
 , open the nixie tube display when the message is lost
 , Lose signal and keep position nixie tube display
 。 Select the sub item of the message loss menu to be set through the up key and down key. After selecting, press the Confirm key to set the action menu of signal loss. Press the Set key to return to the previous menu to set other menu options. 2. Press the flip key, the blue nixie tube displays C2, and the red nixie tube displays flashing
 The symbol indicates the positive and negative action setting menu item. Press the Enter key to enter the positive and negative action setting sub item. There are two options in the sub item, namely, positive action option and nixie tube display
 Symbol. And reaction option nixie tube display
 Symbol, select the menu sub item to set the positive and negative effects through the up key and down key. Press the Enter key to save the set positive and negative action subitem. After setting, press the setting key to return to the previous menu. Continue to set other menu items. 3. Press the flip key, the blue nixie tube displays C3, and the red nixie tube displays flashing
 The symbol indicates the menu item of control signal low end 4mA setting. At this time, given the control low-end signal 4mA, press the OK key to save the low-end control signal value, then the symbol will be displayed
 。 (Note: If no given signal is displayed on nixie tube
 Symbol.) After completion, press the setting key to return to the previous menu and continue to set other menu items. 4. Press the flip key, the blue nixie tube displays C4, and the red nixie tube displays flashing
 The symbol indicates the menu item of 20mA setting at the high end of the control signal. At this time, 20mA at the high end of the given control signal will be displayed by pressing the OK key to save the high end value of the control signal
 Symbol. (Note: If no given signal is displayed on nixie tube
 Symbol.) After completion, press the setting key to return to the previous menu and continue to set other menu items. 5. Press the flip key, the blue nixie tube displays C5, and the red nixie tube displays flashing
 The symbol indicates the menu item of feedback signal low end 4mA setting. Press the Enter key to enter the low end feedback 4mA signal setting. At this time, pressing the UP key once will increase the feedback signal by 0.02mA, and pressing the UP key once will decrease the feedback signal by 0.02mA. Press the Enter key to save the low end value of the feedback signal when it is satisfied. After completion, press the setting key to return to the previous menu and continue to set other menu items. 6. Press the flip key, the blue nixie tube displays C6, and the red nixie tube displays flashing
 The symbol indicates the menu item of 20mA setting at the high end of the feedback signal. Press the Enter key to enter the setting of high-end feedback 20mA signal. At this time, the feedback signal 20mA will increase by 0.02mA after pressing the up key once, and will decrease by 0.02mA after pressing the down key once. After the adjustment is satisfactory, press the Enter key to save the high value of the feedback signal. After completion, press the setting key to return to the previous menu and continue to set other menu items. 7. Press the flip key, the blue nixie tube displays C7, and the red nixie tube displays flashing
 The symbol indicates the sensitivity menu option. Press the Enter key to enter the sensitivity dead zone menu item setting. The default sensitivity dead zone value is 5. Press the up key to increase by one and press the down key to decrease by one. After setting, press the Enter key to save the set sensitivity dead zone value. Press the setting key to return to the previous menu. (Note: The sensitivity dead zone shall be subject to the control accuracy without oscillation. If the sensitivity dead zone value is set too large, the control accuracy will decrease and the error will increase. If the sensitivity dead zone value is set too small, the control accuracy will be high but it is easy to oscillate. It is recommended that the dead zone value be set to a large point appropriately when the control accuracy is met. 8. Press the flip key, the blue nixie tube displays C8, and the red nixie tube displays flashing
 Symbol, indicating the menu setting option of valve stuck or motor locked rotor protection. Press the Enter key to enter the locked rotor protection time setting. The nixie tube displays the locked rotor protection time in seconds. The default protection time is 3S. Press the up or down key to increase or decrease the locked rotor protection time. When finished, press the Enter key to return to the previous menu. 9. Press the flip key, the blue nixie tube displays C9, and the red nixie tube displays flashing
 Symbol, indicating the filter time constant menu setting option. Press the Enter key Enter the filter time constant setting. The default value is 18ms. Press the up or down key to increase or decrease the filter time constant. When finished, press the Enter key to return to the previous menu. 10. Press the flip key, the blue nixie tube displays C10, and the red nixie tube displays flashing
 Symbol, indicating the menu item of manually setting the travel full close and full open positions. Press the OK key to enter the fully closed stroke calibration sub item, and the nixie tube displays
 Symbol. Press the OK key again to enter the manual full close travel calibration, and the nixie tube displays the current travel position. Press the up or down key to calibrate the stroke full close position menu item, and then press the OK key to save and return to the current stroke calibration sub item menu. Press the flip key to display the nixie tube
 Symbol, indicating the menu item of manual calibration travel full open position. Press the Enter key to enter the stroke indicator sub item nixie tube to display the current stroke position. Press the up key or down key to calibrate the stroke fully open position menu item, and then press the OK key to save and return to the current stroke calibration sub item menu. Press the setting key to return to the secondary menu. (Note: Press the setting key once to return to the secondary menu. If you press it twice or shake it, you will exit the menu setting.) 11. Press the flip key, the blue nixie tube displays C11, and the red nixie tube displays flashing
 Symbol, which indicates the menu item setting parameter saving option. Press the Enter key to enter the menu parameter saving option, and the static symbol is displayed
 Do not save, press the flip key to display the symbol
 Save the setting parameters, press the Enter key to save and exit the menu parameter setting. (Note: This item should be used to save the set menu parameters after all parameters of the menu are set, otherwise the set menu parameters are invalid). 12. Press the flip key, the blue nixie tube displays C12, and the red nixie tube displays flashing
 The symbol indicates the menu item of restoring factory default parameters. Press the Enter key to enter the recovery menu item, and press the Enter key again to save the factory default parameters. Press the Enter key to return to the previous menu item (Note: When entering the second level flashing symbol menu item, you can press the scroll up or scroll down key to select other menu sub items you want to set. If you press the scroll down key and miss a menu item, you can press the scroll up key
 Menu item; Scroll down key to symbol
 Menu item; The nixie tube display symbol of each submenu item does not flash, and only the nixie tube display symbol menu item of each main menu item flashes. At this time, press the setting key to exit the menu setting.) 3、 Alarm information When the signal is lost, if the signal loss action is set as the signal loss and position keeping nixie tube display symbol
 And current valve position; The signal loss action is set to open the nixie tube display symbol
 , actuator performs opening action; The signal loss action is set as the signal loss off nixie tube display symbol
 , the actuator executes the closing action. Nixie tube display
 It indicates that the motor is locked or the valve is stuck. 4、 Field operation On site operation, press the flip key for 3s to enter the manual operation state, and press the up flip key actuator to execute the opening action; Pressing the flip key actuator will execute the closing action. At the same time, the blue digital off displays the current valve position feedback signal 10%.
Previous: What parameters should be provided when purchasing electric ball valves
Next: Precautions for selection of electric butterfly valve