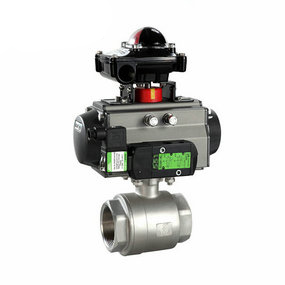
How to adjust the air pressure of pneumatic quick installation butterfly valve? (1) Preparation before installation
Installation method of pneumatic ball valve The front and rear pipelines of pneumatic ball valve shall be prepared. The front and rear pipes shall be coaxial, and the sealing surfaces of the two flanges shall be parallel. The pipeline shall be able to bear the weight of pneumatic ball valve, otherwise the pipeline r must be equipped with proper support.
② Purge the pipelines before and after the valve to remove oil, welding slag and all other impurities in the pipeline.
③ Check the mark of the pneumatic ball valve and make sure that the ball valve is intact. Open and close the valve barrier several times to verify its normal operation.
④ Remove the protective part on the connecting flange at one end of the left pneumatic ball valve.
⑤ Check the valve hole, remove the possible dirt, and then clean the hole. Even if there are only small particles between the valve seat and the ball, the sealing surface of the valve may be damaged.
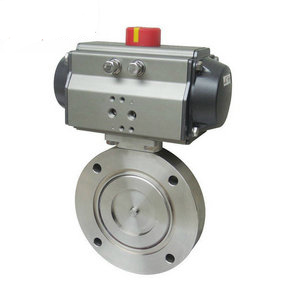
1. Remove the protective covers on both sides of the flange end, and flush and clean the valve when the valve is fully opened.
2. Before installation, the whole machine shall be tested according to the specified signal (electricity or gas) (to prevent vibration caused by transportation from affecting the service performance), and it can be installed online only after it is qualified (wiring shall follow the circuit diagram of electric actuator).
3. Before preparing to connect with the pipe, the residual impurities in the pipe must be flushed and removed (these substances may damage the valve seat and ball).
4. During installation, please do not use the actuator part of the valve as the lifting point to avoid damage to the actuator and accessories.
5. This type of valve shall be installed in the horizontal or vertical direction of the pipeline.
6. The pipeline near the installation point shall not sag or bear external force, and the pipeline support or support can be used to eliminate the deviation of the pipeline.
7. After connecting with the pipeline, please cross lock the flange connecting bolts with the specified torque.